The Calvera Interface
This is a guide for using the Calvera interface located at https://calvera.ornl.gov.
Overview
Calvera is a platform for neutrons data analysis and data reduction. It is an instance of Galaxy - an open source platform for FAIR data analysis. If you've used any other instance of Galaxy elsewhere, then Calvera will largely operate in the same manner. There are modifications that are made from time to time by our team that will be deployed to Calvera before being merged into the main Galaxy repository, however we plan to introduce most if not all of our changes to the broader Galaxy community at some point in time.
The home page of Calvera is at calvera.ornl.gov. From any location in Galaxy, you can return home by clicking the "Neutrons Data Analysis" logo in the top left-corner of the screen or through clicking the home icon in the navigation bar:
![]()
There's not actually much to do on the home page, but it does provide links to some interactive tours that cover some basic Galaxy concepts.
Tools
The main pieces of Galaxy that enable the construction and execution of analysis are tools. Tools are simply wrappers for a piece of software. They have an interface that allows you to enter input parameters, and Galaxy collects both their file outputs, as well as standard out and error. Tools can be run on various compute resources, and can be run individually or as a part of a workflow or a series of tools linked together. Workflows will be covered in more detail later in this tutorial.
Tools are listed on the left-hand side of the screen in the tool panel.
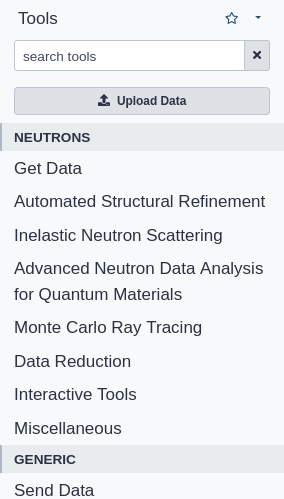
Each tool is listed under a tool section which is simply a way of organizing tools for different purposes. If you know which section the tool you want is listed under, you can simply click on the section and it will expand and list all of its tools. In order to load the interface for a tool, simply click on the name of the tool in the list. There is also a search bar at the top of the panel that can be used to find a specific tool.
After clicking on a tool, at the top right of the tool interface, you can click the star icon to mark a tool as a favorite.

This will put this tool into a special section for easy access. In order to access this section, you can click the star at the top of the tool panel next to the "Tools" label above the search box.

Tools have fairly standard methods of entering information into its interface. Drop-down menus, text boxes, check-boxes, and other common input methods are used to set the input parameters for the tool. When the inputs are set, tools can be run by clicking the "Run Tool" button at the bottom of the tool interface.

After a tool is executed it will appear on the right-hand side of the screen in the History panel
Histories
Histories are both a record of tools that are currently running, often referred to as jobs, as well as jobs that have been previously run alongside their outputs.
While a job is running, its entry will be colored similar to beige.

Once a job has completed, it will be green.
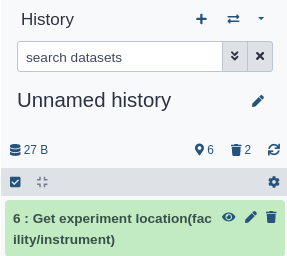
If the job failed in any way it will be red.

If a job fails, at the moment, no outputs are saved.
In order to see the output of a job (if it is available), you can click the eye icon. Jobs can also be renamed by using the pencil icon. Jobs can be expanded or collapsed by clicking on the name of the job. Expanding the job will give you a little more information about the job. In order to view the full details of the job including the standard out, you can click on the information icon.
![]()
The rest of the icons here can be used for other tasks such as downloading a job output dataset, visualization, or getting a link to that job, and if you hover over the icons they have a description of what their purpose is.
Basic Data
Now that we have an understanding of tools and histories, we can use these concepts to work with data. Data in Galaxy is generally referred to as a dataset. Multiple datasets grouped together are called data collection. If a tool produces an output, it will do so in the form of a dataset or data collection. These will be represented as a listing in your history. A simple way to see this is through the "Upload Data" tool. If you click on the Upload Data tool, then drop a file from your desktop or file browser into the window and hit the start button, you'll notice that a new job gets launched for uploading that file. After it is finished, you can use that dataset as input for other tools. This is basic workflow for Galaxy as a whole. Fetch data (uploading it in this case, but there are other methods that we can discuss later), use the data as an input for a tool, and then when that job is finished it will also have produced some data as an output. Then you repeat the process with that output data.
Workflows
Workflows are a formal way of constructing a series of tools in a way where the output of one tool is automatically fed as an input into another. Galaxy has a graphical interface for constructing workflows that can be accessed by clicking on the Workflow link in the navigation bar at the top of the screen. All of your created workflows are listed here. From here in the top-right corner, you can click the "Create" button to get started on a new workflow. After naming your workflow and clicking another Create button, you'll be presented with a blank panel in the middle of the Galaxy interface. From here in order to add a tool to your workflow, you can click on it exactly like you would on the home page. The tool will appear as a box in the interface, and outputs will be represented by arrows on the right side of the box.
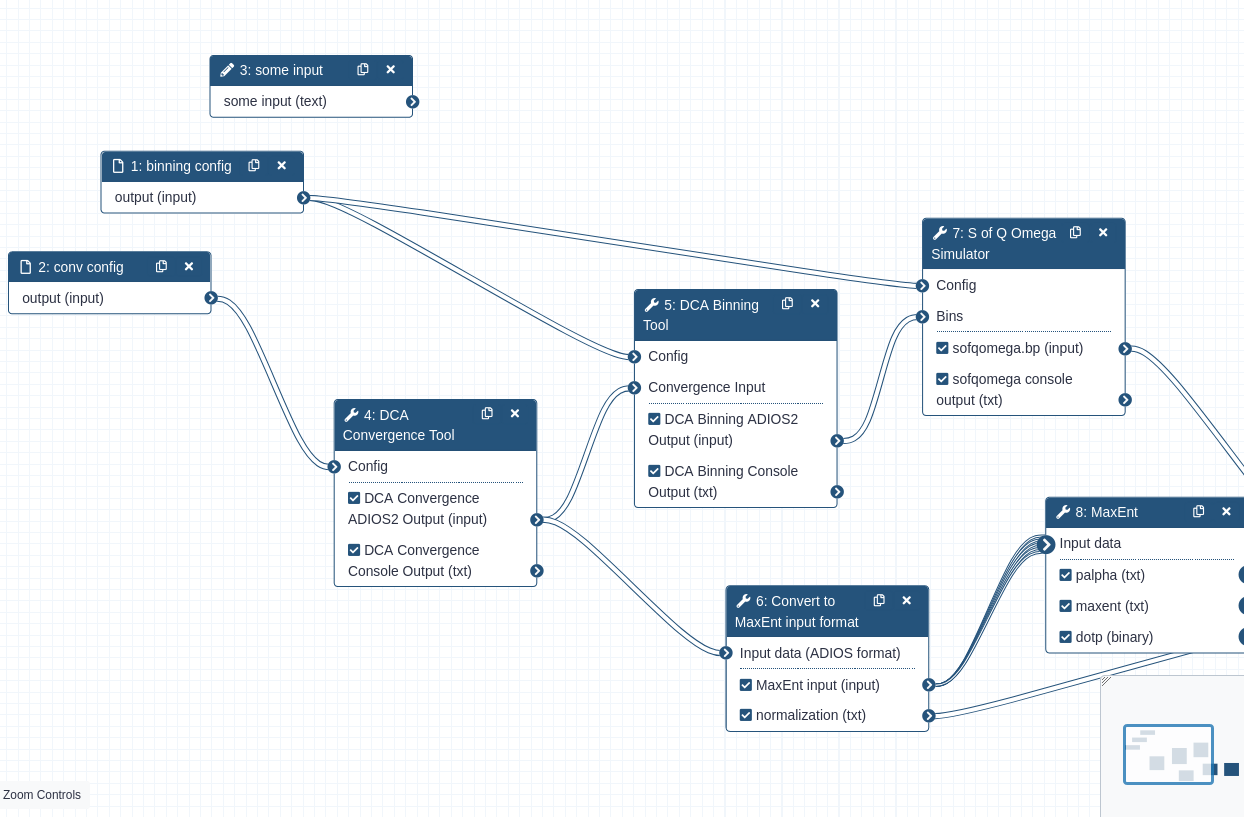
Tools can be connected by clicking the output arrow of one tool and holding then dragging it to the input arrow of another tool. Note, tools can only be connected if their input types match the output types that you're trying to connect.
On the right side of the screen, you have a panel that functions as the tool interface for whatever tool you currently have selected. Here you can enter in input values and do anything you would in the normal tool interface.
After you have made changes to your workflow, make sure that you save it by clicking the save button at the top right-hand of the screen.
![]()
You can then run your workflow by clicking the run button in the top right of the screen as well.
![]()
Your workflow will then execute each step as individual jobs, and you can see their outputs as you would any other job.
Visualization
Galaxy does have some basic ways of visualizing data available. The quickest way to use the built-in visualization features of Galaxy is to go to a dataset in your history and click on the "Visualize" icon.
![]()
From here you can search for and select your desired form of visualization. These visualizations aren't comprehensive, and you may need to search for a tool to do more complicated visualizations for your work.
Obtaining SNS/HFIR Data
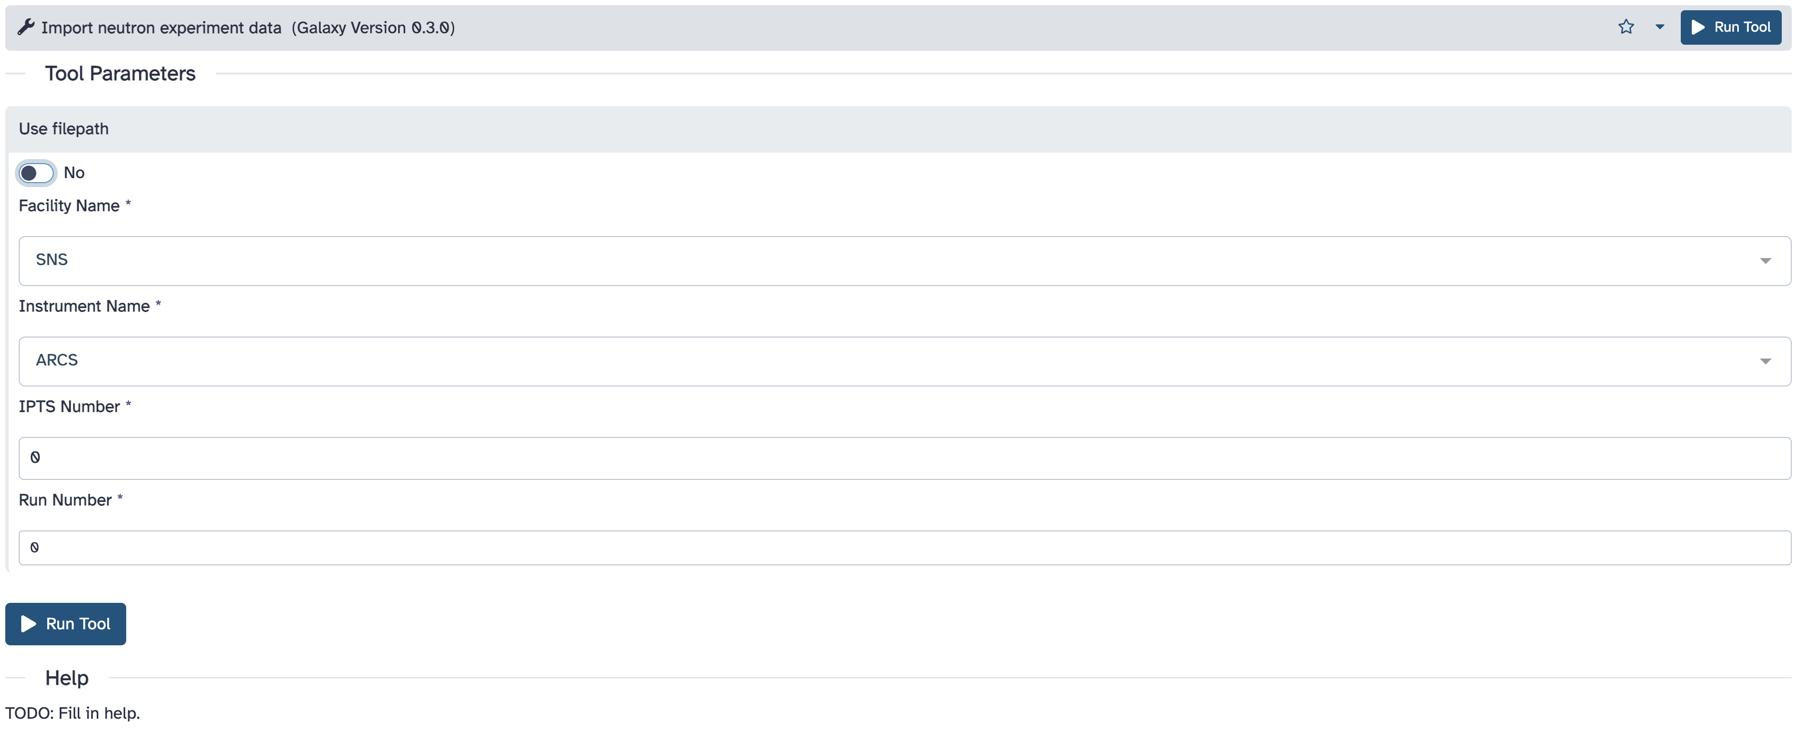
The recommended way of obtaining data is using the "Import neutron experiment data" tool. This way you do not replicate data in Galaxy, but just register it there. This tool can be located by searching for the name in the tool search bar or by looking under the Get Data section in the tool panel.

With this tool you can register data using IPTS/Run number (choose the facility and instrument, and enter in the IPTS and run numbers)
or directly specify a filepath
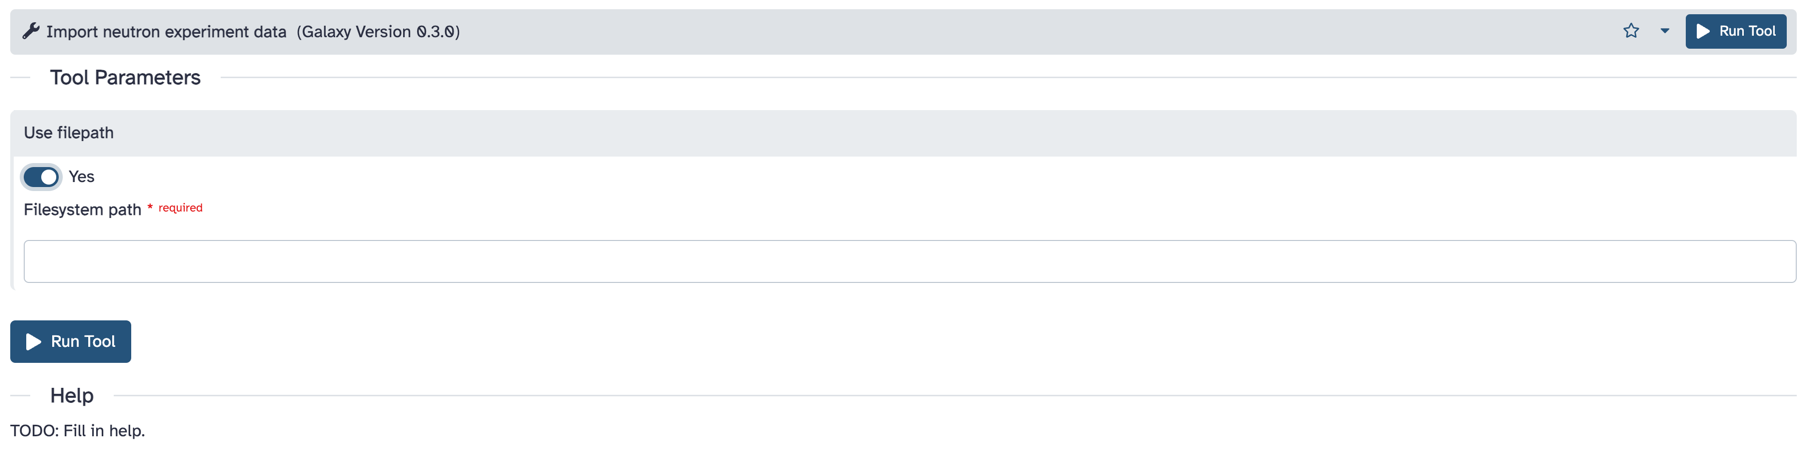
From here, you can click the "Run Tool" button and your experiment data will be fetched.
Alternatively, you can search for your files directly through the in-built Galaxy file browser. You can access this by clicking on the "Upload Data" button.

From here you should see a panel pop up. While you can upload files directly from your computer here, in order to access SNS storage, locate the "Choose remote files" option at the bottom of the panel. From here the file browser will show up, allowing you to access the SNS file system. Navigate the system as you would any other visual file browser. (Note if the private SNS storage option shows an error, try refreshing your browser page or logging out of your UCAMS account and back in.) Once you have found the file you want, select it and click the "Ok" button in the bottom right corner of the screen.

To finish the process, click the "Start" button in the bottom of the initial panel, and Galaxy should begin fetching your data. Note that currently with this method data will be replicated into Galaxy storage, so do not use it for large files.
Sharing
All your data, workflows, and histories are designed to be able to be shared both publicly or only with specific people or groups. The sections below describe the common ways of sharing each of them.
Sharing Your Data
Datasets can be shared in several ways. One is to use the "Copy Link" icon on the job listing in your current history.
![]()
Another useful way of sharing data is through sharing your history with said data in it. This can be done by going to the top-right hand corner of the history panel and clicking the drop-down arrow.

From here, you will see a page with the current accessibility of this history alongside two checkboxes and some other elements. The first checkbox makes the history publicly accessible if they have the url to the history. Said url is listed here so that you can share with other people. The second checkbox allows you to list your history in the "Shared Data" section of the navigation bar.
If you would prefer to share your history with specific users, you can expand the box at the bottom of the panel and then enter their email associated with their UCAMS within the box. Click save, and then they should have access to the history. In order to see what histories have been shared with you, you can click the "User" menu in the navigation bar, and click the "Histories shared with me" link.
Workflows can be shared by going to the Workflow page from the navigation bar, clicking the arrow next to the workflow that you want to share, and selecting the share option. Here you will see a similar interface to the Histories share panel. The checkbox here will make the workflow public and the individual user panel lets you enter UCAMS emails similar to histories.
Importing Shared Data
In order to import a history that is shared to you, navigate to the history details page by either clicking on the link that was shared to you, going to the User menu in the navigation bar and clicking on the "Histories shared with me" link (and then selecting the specific history), or by going to publicly accessible histories in the Shared Data -> Histories link in the navigation bar. Once at the history details page, you can see all of the datasets and jobs associated in this history. You can import the history by going to the top-right corner of the screen and clicking the "Import" button.
Workflows can be imported by going to the link shared with you or by going to Shared Data -> Workflows in the navigation bar and selecting the workflow. From here you can import the workflow by going to the top-right hand corner of the screen and clicking the "Import" plus button. From here workflows will appear in your Workflows page, which you can get to from the navigation bar.
Conclusion
This tutorial covers the basics of using Calvera. There are more tutorials on this training site that delve deeper into specific topics. And like with most software, the best way to learn is to get in and experiment with it yourself.